Enrollment
Registering for classes and dropping classes via MyRecords in a simple process. Follow the instructions below.
Contact the ITS Help Desk with any issues you might have by phone at 402-559-7700 or by email.
Registering for Classes in MyRecords
- Log in to MyRecords using your NetID and password.
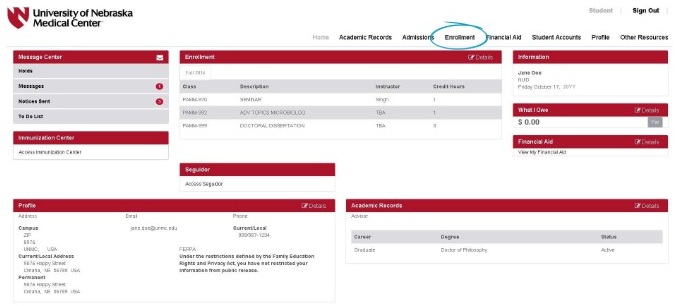
- On the top menu, click the Enrollment tab.
- Use the Advanced Class Search, and start with a course Subject. If you know the course number you want, you can find it by using the Catalog Number drop down box. Only courses offered that term will appear as options.
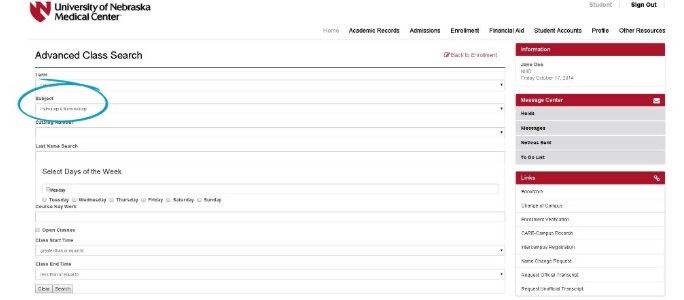
- After you have entered your search criteria, click the Search button. You will be presented with a list of all classes that meet your criteria.

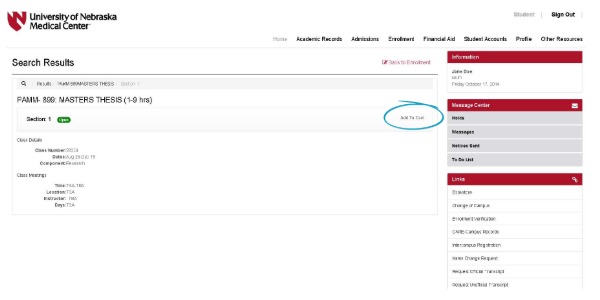
- Select the class that you want to add to your shopping cart. Click the Add to Cart button.
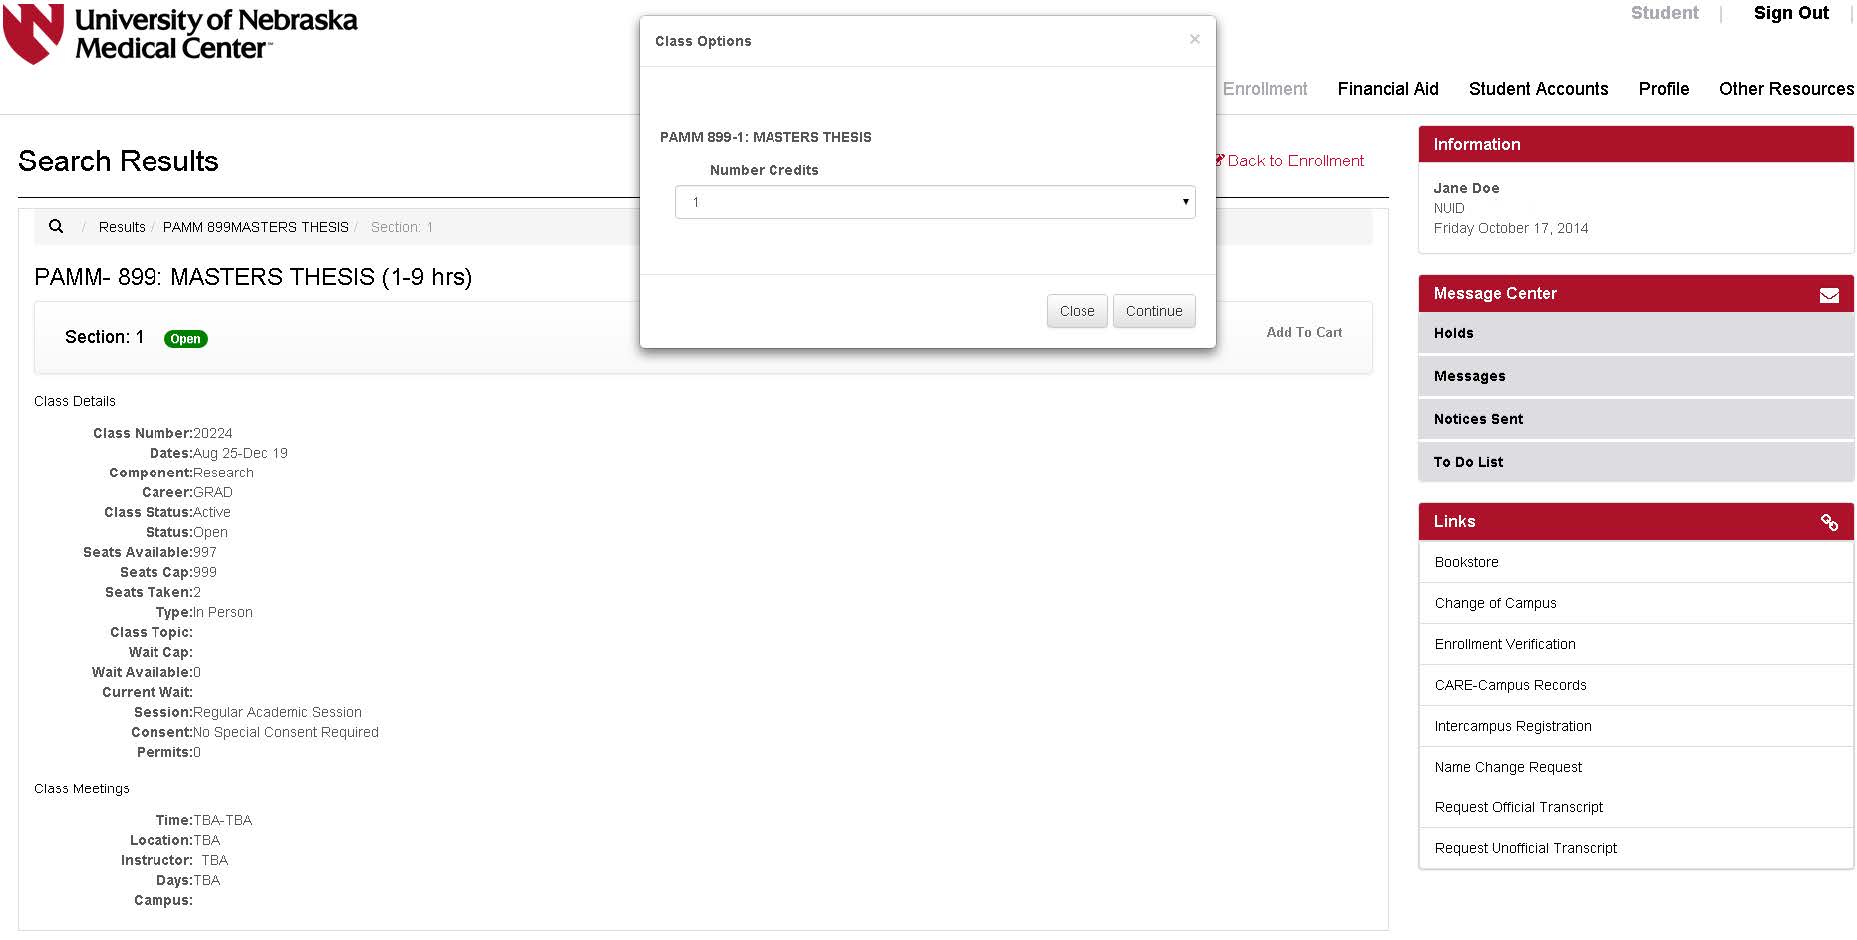
- If the class has variable credit hours, a Class Options dialog box will appear. Enter the number of credit hours that you would like to enroll in, and click Continue.
- Submit your shopping cart to the enrollment process.
Adding a class to your shopping cart does not reserve your spot in the class and does not mean you are registered in the class. You can leave classes in your shopping cart as long as you want, but you are not actually registered in them until you complete the registration process.
To complete the actual registration process, click the Proceed to Enrollment Checkout button below your shopping cart.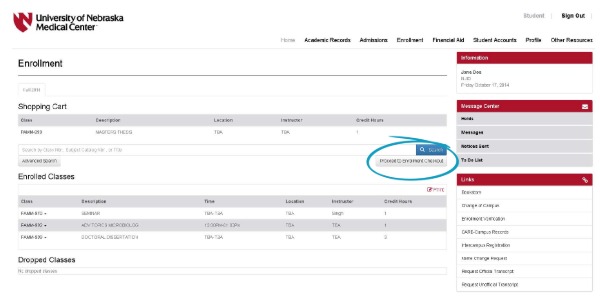
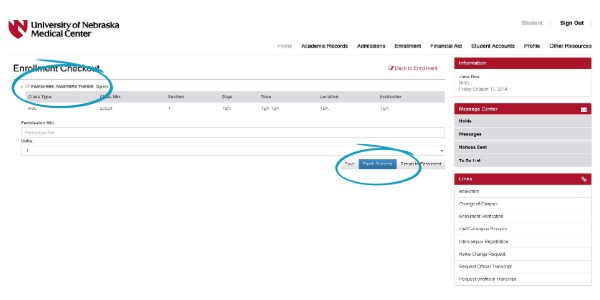
- On the Enrollment Checkout registration confirmation screen, do the following:
- Select the checkbox next to the class you would like to enroll in.
- Edit Variable Credit Hour Units or Add a Permission Number for the course, if needed before you complete your enrollment.
- Click the Enroll Selected button to submit your shopping cart to the system for processing. Important: Clicking the Save button will not enroll you in classes. The Save button saves any changes you might have made but leaves the courses in your shopping cart. You have not started the enrollment process until you click the Enroll Selected button.
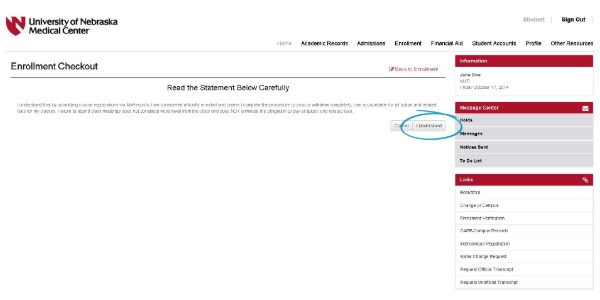
- An Enrollment Disclaimer screen appears. After reading the statement, click I Understand to continue the enrollment process.
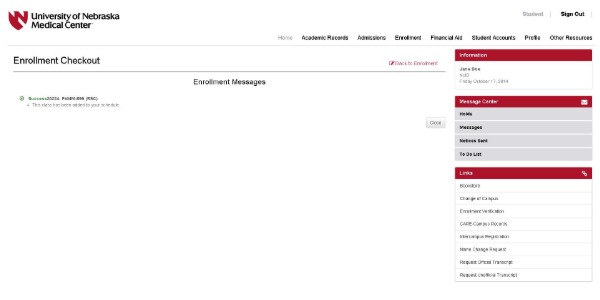
- After the process has been completed, the system will confirm whether you were successful in registering for the class(es). If you have multiple classes in your shopping cart, the system will confirm the status of each class. Carefully review any error messages you receive and take action to resolve the errors.
Dropping a Class
- Log in to MyRecords using your NetID and password.
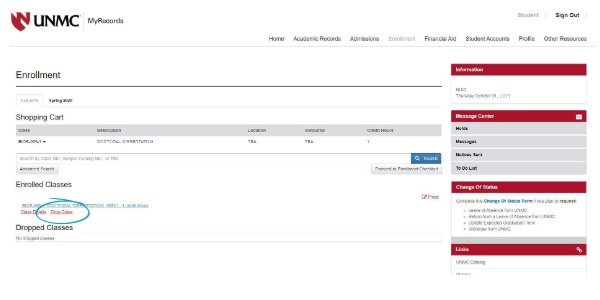
- On the top menu, click the Enrollment tab. The screen will shows the following:
- Under Shopping Cart, a list shows the classes in your shopping cart for which you are not registered.
- Under Enrolled Classes, a list shows all classes in which you are currently enrolled for the term.
- Click the Drop Class link below the class you want to drop.
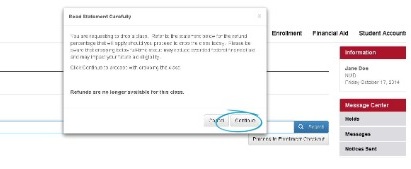
- A confirmation dialog box appears asking you to confirm your selection. If everything is correct, click the Continue button to submit your request to the system for processing.
- After the drop process is complete, the system displays the Enrollment tab. The class you dropped should not be listed in the Enrolled Classes section. If you dropped classes after the first week, you will see them under the Dropped Classes section.

Intercampus/Change of Campus

UNMC Academic Records
Williams Science Hall, second floor
984230 Nebraska Medical Center, Omaha, NE 68198-4230
402-559-6796