Adding a Parent or Guest User
The following information explains how a student can add parent or guest access to their student account.
- Log into MyRecords.
- On the top menu, click Profile.
- Click Edit Guest Access.
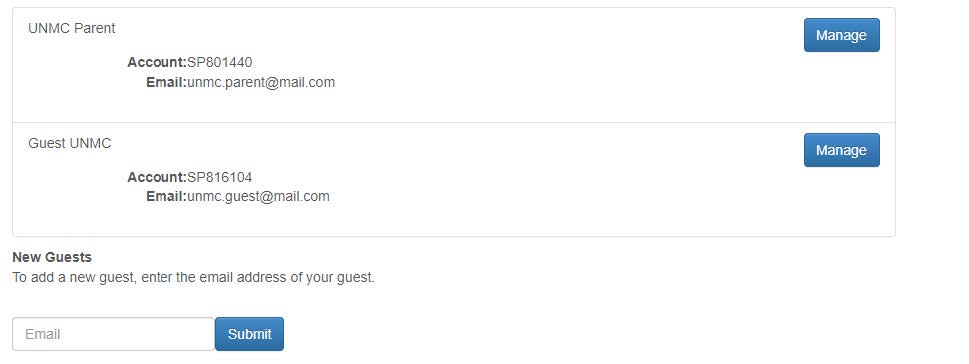
- Enter the email address of the parent/guest to which you want to grant access. Then, click Submit.
- Enter your guest's first name, last name and date of birth. Click Submit.
- To add access, complete the following tasks.
- Select the check boxes to for the different types of online and in-person access to grant. Click the "i" icons following each option to learn more about that option.
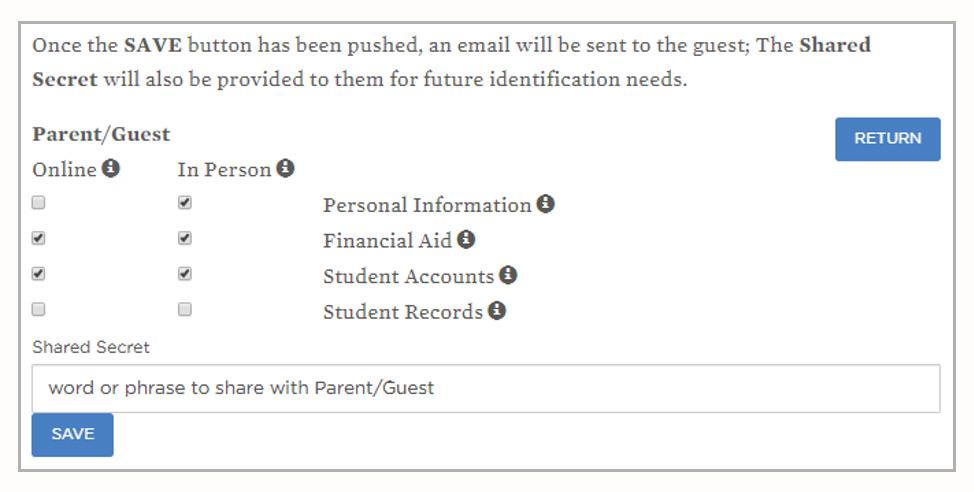
- In the Shared Secret box, type a shared secret word or phrase for future account identification.
- Click the Save button. An email will be sent to the parent/guest with instructions to complete their account creation.
- Select the check boxes to for the different types of online and in-person access to grant. Click the "i" icons following each option to learn more about that option.
Managing Existing Parent or Guest Access
Complete these steps if there is already a guest account created that you want to grant access. (For example, you have a sibling who attends that has setup access for your parent)
- Log into MyRecords.unmc.edu.
- On the top menu, click Profile.
- Click Manage Guest Access. A list of all the guest user accounts associated with the email account appears.
- Click the Manage button to edit the access for a specific user. This step may require you to confirm the ID that your guest is using.
- Select or deselect the check boxes for the different types of online and in-person access to grant or remove. Click the "i" icons following each option to learn more about that option.
- Click the Save button. An email will be sent to the parent/guest with instructions to complete their account creation.
Understanding the Parent/Guest Dashboard
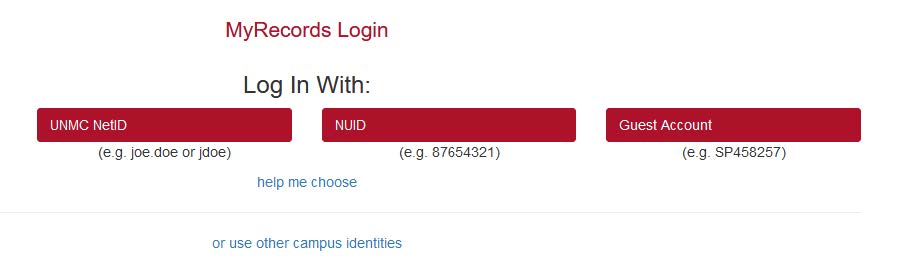
After a student grants access to their account, the Guest/Parent will need to log into the MyRecords by clicking the Guest Account button and entering credentials.
The guest dashboard will list all student accounts to which the guest account has access.
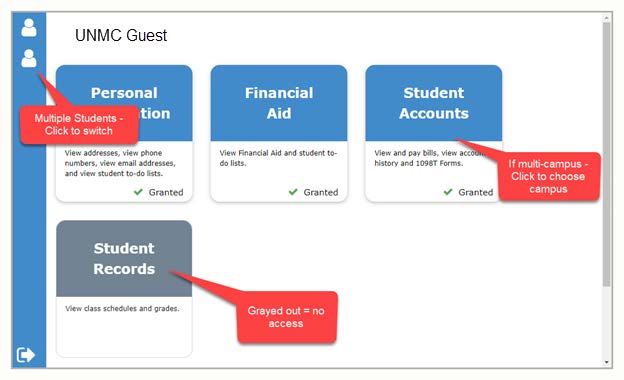
- Blue tiles with a student's name indicates the student has granted guest access.
- Gray tiles with a student's name indicates the student has not yet granted guest access.
- If the student attends more than one campus, a list will appear over the tiles. The guest can select the appropriate campus.